FrameLayout布局的应用
FrameLayout布局
这个布局直接在屏幕上开辟出一块空白的区域,当我们往里面添加控件的时候,会默认把他们放到这块区域的左上角,而这种布局方式却没有任何的定位方式,所以它应用的场景并不多;
两个属性:
android:foreground:*设置改帧布局容器的前景图像
android:foregroundGravity:设置前景图像显示的位置
FrameLayout布局功能
子元素逐个重叠放入栈中
最后添加的子元素显示在最上面
Toast控件的应用
Toast控件的用途
弹出提示消息
可设置弹出时间长度
Toast控件的常用方法
| 方法名称 |
描述 |
| makeText |
定义消息内容 |
| setGravity |
设置布局位置 |
| getView |
获取Toast视图 |
| show |
显示 |
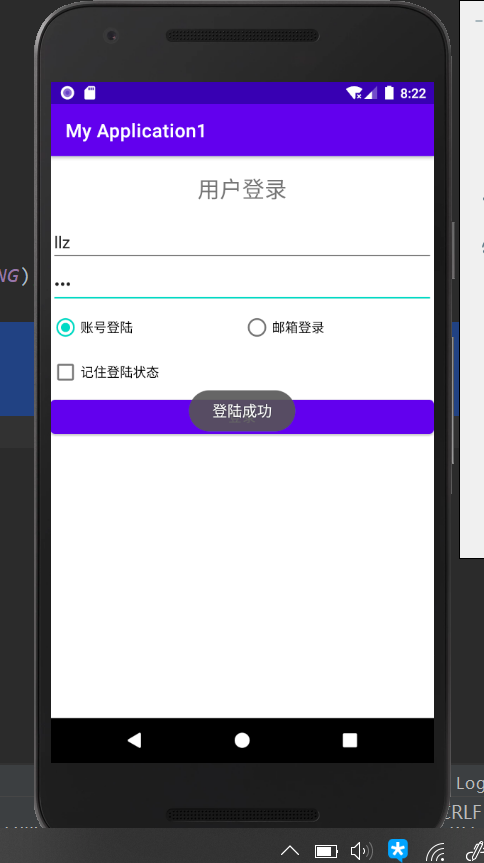
方法一:默认纯文字提示
1
| Toast.makeText(this, "登陆成功", Toast.LENGTH_LONG).show();
|
演示:
方法二:自定义提示位置
1
2
| Toast toast = Toast.makeText(this, "登录成功", Toast.LENGTH_LONG);
toast.setGravity(Gravity.CENTER,0,0);
|
演示:
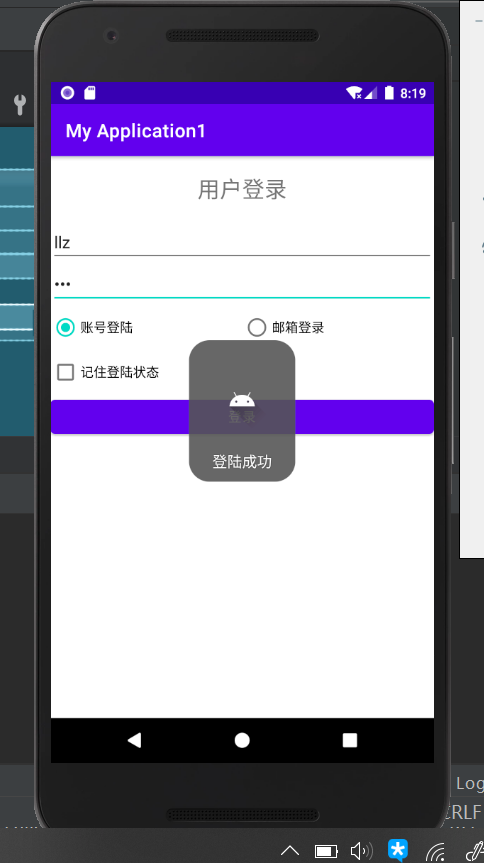
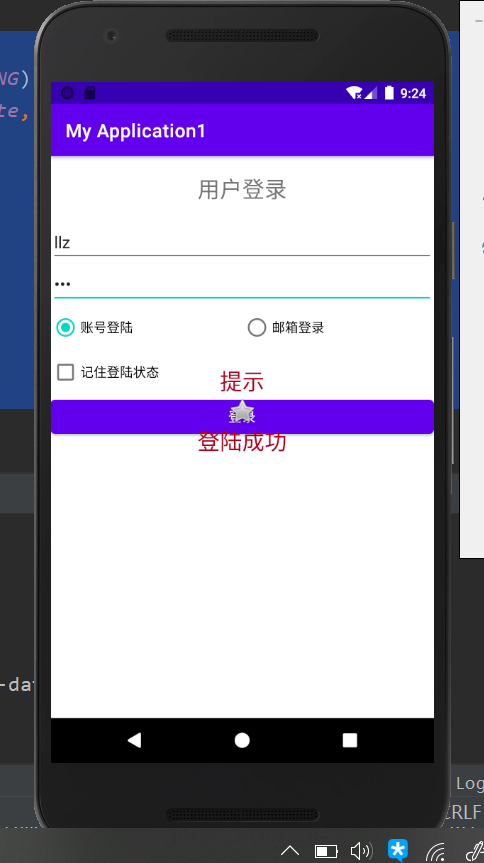
方法三:自定义带图片信息提示
1
2
3
4
5
6
7
| Toast toast = Toast.makeText(MainActivity.this, "登录成功", Toast.LENGTH_LONG);
toast.setGravity(Gravity.CENTER,0,0);
LinearLayout layout = (LinearLayout)toast.getView();
ImageView img = new ImageView(getApplicationContext());
img.setImageResource(R.drawable.ic_launcher_foreground);
layout.addView(img,0);
toast.show();
|
演示:
方法四:自定义布局的信息提示
1
2
3
4
5
6
7
8
9
10
11
12
13
| void ToastShow(String context){
Toast toast = Toast.makeText(MainActivity.this, context, Toast.LENGTH_LONG);
View view = LayoutInflater.from(MainActivity.this).inflate(R.layout.toast_template,null);
TextView TxtTaostContext = (TextView)view.findViewById(R.id.TxtTaostContext);
TxtTaostContext.setText(context);
toast.setView(view);
toast.setGravity(Gravity.CENTER,0,0);
toast.show();
}
|
演示:
PopupWindow 是一个可以在Activity 之上显示任意View的控件。在Android经常使用,效果跟Dialog 效果类似,不同点在于可以控制显示的位置,比如底部显示等。
浮动弹出自定义窗体
可设置弹出位置
| 方法名称 |
描述 |
| PopupWindow |
构造函数,常用参数表: contentView – 弹窗界面内容 width – 弹窗宽度 height – 弹窗高度 focusable – 能否聚焦 |
| setTouchable |
是否支持点击操作 |
| showAtLocation |
按指定位置弹出显示自定义视图 |
| showAsDropDown |
下拉弹出显示自定义视图 |
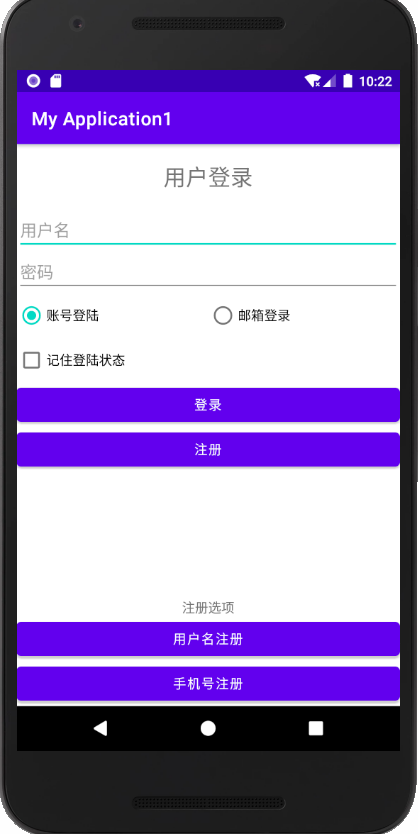
示例及代码
Test01
1
2
3
4
5
6
7
8
9
| public void Register(View view){
Button RegBtn = (Button)findViewById(R.id.RegBtn);
View Contentview = LayoutInflater.from(MainActivity.this).inflate(R.layout.popup_content,null,false);
PopupWindow window = new PopupWindow(Contentview, LinearLayout.LayoutParams.MATCH_PARENT,LinearLayout.LayoutParams.WRAP_CONTENT,true);
window.setTouchable(true);
window.showAtLocation(getWindow().getDecorView(), Gravity.BOTTOM, 0,0);
}
|
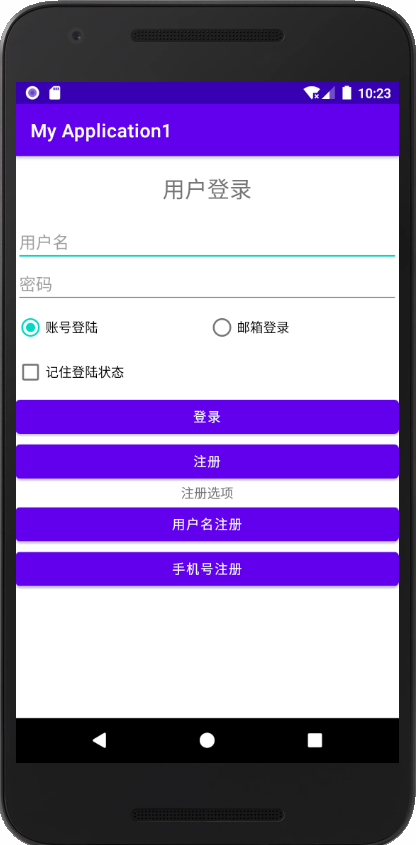
Test02
1
2
3
4
5
6
7
8
9
10
| @RequiresApi(api = Build.VERSION_CODES.KITKAT)
public void Register(View view){
Button RegBtn = (Button)findViewById(R.id.RegBtn);
View Contentview = LayoutInflater.from(MainActivity.this).inflate(R.layout.popup_content,null,false);
PopupWindow window = new PopupWindow(Contentview, LinearLayout.LayoutParams.MATCH_PARENT,LinearLayout.LayoutParams.WRAP_CONTENT,true);
window.setTouchable(true);
window.showAsDropDown(RegBtn,0,0,Gravity.BOTTOM);
}
|
AlertDialog的应用
AlertDialog的用途
弹出警告窗体,提示重要信息,提示用户再次确认操作
可设置确认、取消按钮等事件
AlertDialog警告窗体的常用方法
| 方法名称 |
描述 |
| show |
显示警告窗体 |
| isShowing |
判断警告窗体是否处于显示状态 |
| setTitle |
设置警告窗体标题 |
| setIcon |
设置图标 |
| setMessage |
设置警告内容正文 |
| setButton |
设置操作按钮 |
AlertDialog.Builder警告窗体的构造器的常用方法
| 方法名称 |
描述 |
| AlertDialog.Builder |
警告窗体构造器的构造函数 |
| builder.create |
创建警告窗体 |
1
2
3
4
5
6
7
8
9
10
11
12
13
14
15
16
17
18
19
20
21
22
23
24
25
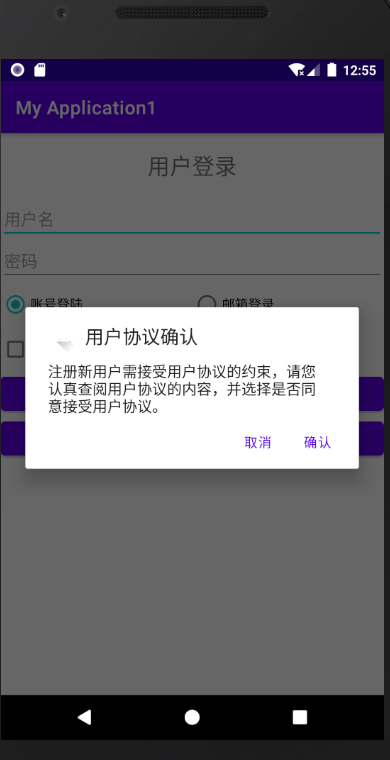
| public void SureReg(View view){
AlertDialog alert = new AlertDialog.Builder(MainActivity.this).create();
alert.setTitle("用户协议确认");
alert.setIcon(R.drawable.ic_launcher_foreground);
alert.setMessage("注册新用户需接受用户协议的约束,请您认真查阅用户协议的内容,并选择是否同意接受用户协议。");
alert.setButton(AlertDialog.BUTTON_POSITIVE,"确认",new DialogInterface.OnClickListener(){
@Override
public void onClick(DialogInterface dialog, int which) {
Button RegBtn = (Button)findViewById(R.id.RegBtn);
View Contentview = LayoutInflater.from(MainActivity.this).inflate(R.layout.popup_content,null,false);
PopupWindow window = new PopupWindow(Contentview, LinearLayout.LayoutParams.MATCH_PARENT,LinearLayout.LayoutParams.WRAP_CONTENT,true);
window.setTouchable(true);
window.showAtLocation(getWindow().getDecorView(), Gravity.BOTTOM, 0,0);
}
});
alert.setButton(AlertDialog.BUTTON_NEGATIVE,"取消",new DialogInterface.OnClickListener(){
@Override
public void onClick(DialogInterface dialog, int which) {
ToastShow("只有接受用户协议,才能注册新用户。");
}
});
alert.show();
}
|
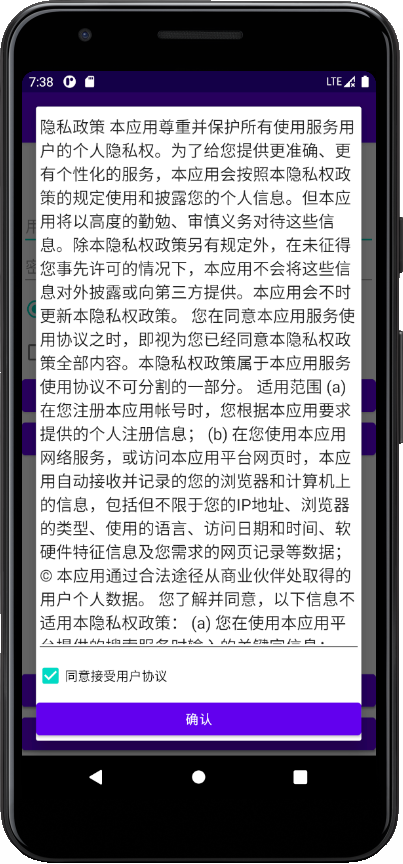
自定义对话框(CustomDialog)的应用
自定义对话框
开发者可以设计继承于android.app.Dialog的自定义对话框派生类(有时习惯命名为CustomDialog)。
弹出自定义界面的对话框,用户可在对话框进行下一步操作
输入输出界面、操作按钮事件等均可自定义
Dialog派生类支持的常用方法
| 方法 |
描述 |
| 构造函数 |
实例化过程中的初始化程序,可自定义参数表传入用户自定义参数 |
| onCreate |
对话框初始化 |
| show |
显示对话框 |
CustomDialog类
1
2
3
4
5
6
7
8
9
10
11
12
13
14
15
16
17
18
19
20
21
22
23
24
25
26
27
28
29
30
31
32
33
34
35
36
37
38
39
40
41
42
43
44
45
| package com.example.myapplication1;
import android.app.Dialog;
import android.content.Context;
import android.os.Bundle;
import android.view.View;
import android.view.Window;
import android.view.WindowManager;
import android.widget.Button;
import android.widget.CheckBox;
import androidx.annotation.NonNull;
public class CustomDialog extends Dialog {
private OnCustomDialogLister customDialogLister;
public CustomDialog(@NonNull Context context,OnCustomDialogLister customDialogLister) {
super(context);
this.customDialogLister = customDialogLister;
}
public interface OnCustomDialogLister{
public void btnConfirmLicenseClicked(boolean isConfirm);
}
@Override
protected void onCreate(Bundle savedInstanceState) {
super.onCreate(savedInstanceState);
setContentView(R.layout.customer_dialog);
Window window = this.getWindow();
WindowManager.LayoutParams lp = window.getAttributes();
lp.width = WindowManager.LayoutParams.MATCH_PARENT;
this.getWindow().setAttributes(lp);
Button btnConfirmLicense = (Button)findViewById(R.id.BtnConfirmLicense);
btnConfirmLicense.setOnClickListener(new View.OnClickListener() {
@Override
public void onClick(View v) {
CheckBox cbConfirm = (CheckBox)findViewById(R.id.CbConfirmLicense);
customDialogLister.btnConfirmLicenseClicked(cbConfirm.isChecked());
}
});
}
}
|
customer_dialog.xml
1
2
3
4
5
6
7
8
9
10
11
12
13
14
15
16
17
18
19
20
21
22
23
24
25
26
27
28
| <?xml version="1.0" encoding="utf-8"?>
<LinearLayout xmlns:android="http://schemas.android.com/apk/res/android"
android:layout_width="match_parent"
android:layout_height="match_parent"
android:orientation="vertical">
<EditText
android:id="@+id/TxtLicense"
android:layout_width="match_parent"
android:layout_height="match_parent"
android:layout_weight="8"
android:ems="10"
android:gravity="start|top"
android:inputType="textMultiLine"
android:text="@string/TxtUserLicense" />
<CheckBox
android:id="@+id/CbConfirmLicense"
android:layout_width="match_parent"
android:layout_height="wrap_content"
android:text="@string/CbLicense" />
<Button
android:id="@+id/BtnConfirmLicense"
android:layout_width="match_parent"
android:layout_height="wrap_content"
android:text="@string/BtnConfirm" />
</LinearLayout>
|
Main.Activivy.java
1
2
3
4
5
6
7
8
9
10
11
12
13
14
15
16
| public void SureReg(View view) {
CustomDialog customDialog = new CustomDialog(MainActivity.this, new CustomDialog.OnCustomDialogLister() {
@RequiresApi(api = Build.VERSION_CODES.KITKAT)
@Override
public void btnConfirmLicenseClicked(boolean isConfirm) {
if (isConfirm) {
ToastShow("感谢您注册成为我们的新用户");
Register(view);
} else {
ToastShow("只有同意才能注册");
}
}
});
customDialog.show();
}
|
示例